I'm making pumpkin creme brulees for Thanksgiving dessert and wanted to see if anyone has a good recipe! I've looked online and have found some with varying ingredients but since I've never made them before I'm not sure which one to use!
I've been meaning to post an adorable cake I made for a one year old's birthday. Hopefully I'll have time to post it next week!
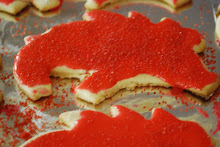
Friday, November 19, 2010
Saturday, November 6, 2010
Pumpkin Whoopie Pies
Yes, it has been over a month since I blogged last. I will spare you the boring details about how busy my life has been and just get to the recipe! Pumpkin whoopies pies, courtesy of Martha Stewart, are perfect for fall. I'm one of those people that loves Fall, not only because it's my birth season (see my birthday cake below), but because everything pumpkin flavored comes back!

Ingredients
3 cups flour
1 teaspoon salt
1 teaspoon baking powder
1 teaspoon baking soda
3 tablespoons ground cinnamon
1 tablespoon ground ginger
1 tablespoon ground cloves
2 cups firmly packed dark brown sugar
1 cup vegetable oil
1 can pumpkin filling, chilled
2 eggs
1 teaspoon vanilla extract
Filling ingredients
3 cups confectioners' sugar
1 stick unsalted butter, softened
8 oz. cream cheese, softened
1 teaspoon vanilla extract
Directions
Preheat oven to 350 degrees. In a large bowl, whisk flour, salt, baking powder, baking soda, cinnamon, ginger, and cloves. Set aside. In a stand mixer, mix brown sugar and oil until well combined. Add pumpkin filling and mix well. Add eggs and vanilla until well combined. Sprinkle flour mixture over pumpkin mixture until fully incorporated. Drop heaping tablespoons of dough on a parchment-lined baking sheet about 1 inch apart. Bake until cookies are just starting to crack on the top - about 15 minutes.
Icing - sift confectioners' sugar in a large bowl. In a stand mixer with a paddle attachment beat the butter until smooth. Add the cream cheese until well combined. Add sugar and vanilla and beat just until smooth. Transfer filling to a disposable pastry bag and spread a healthy portion on the bottom side of one cookie and place the second cookie on top. Refrigerate for 30 minutes.
And as promised, here is my birthday cake from my 25th birthday! I think Ben did a great job telling Miss Muff'n what I wanted!

Friday, October 1, 2010
Furniture Makeover
I recently re-did a small China cabinet Ben's mom gave me. And when I say "re-did" I don't mean that I did anything that a normal person couldn't do. Just sanded, primed, and painted!
Supplies:
Small can of gray primer (I used Glidden brand)
pack of 150 grit sandpaper
1/2" and 2" paint brushes
pack of small paint brushes (for the detail on the front)
painters tape
small can of paint (I used Martha Stewart "Maine Lobster" in eggshell paint finish)
scrap newspaper
 The cabinet had a medium brown stain when I got it, and while researching I found lots of people who said that you have to completely remove the stain before you can paint. WRONG. That would have taken me YEARS to finish. Luckily, Stacy (of The Little Chick fame) gave me some very helpful and time-saving pointers before I started on this little project!
 I started out by sanding everything with 150 grit sandpaper. I can't take all of the credit for the sanding, Ben was definitely helpful, because let's be honest, sanding is no fun. FYI - I would remove any doors or anything like that and sand those separately.
 After we finished sanding, we wiped down everything with a damp cloth and let it dry for a couple of minutes. As you can see, I had to carefully place strips of newspaper behind the wood on the front so I could paint it. While this did not 100% keep paint off the glass it was definitely helpful. Hint - about 5 minutes after you paint the primer remove the newspaper, otherwise the paint will make it stick to the wood (I learned this the hard way) and use new newspaper strips when painting the top coat.
 While priming the cabinet I decided to leave the back and bottom brown, but after painting the first coat of red paint I went back and painted the bottom red because something just didn't look right.
 Then the red painting started. I did two coats, which was the perfect amount. At first I was nervous about this color, because it's red and red can easily go horribly wrong, but after it was all said and done I loved it!
 Hint - do not go by what colors look like on the internet. They are wrong wrong wrong. Go look up Maine Lobster. It looks nothing like this.

This project was so much fun and really didn't take very long (and you don't have to be a furniture expert to do it)! I probably could have finished in one weekend if I had devoted most of my time to it. If any of my instructions weren't clear or if you have any questions just e-mail me - jstansbakery [at] gmail [dot] com
Supplies:
Small can of gray primer (I used Glidden brand)
pack of 150 grit sandpaper
1/2" and 2" paint brushes
pack of small paint brushes (for the detail on the front)
painters tape
small can of paint (I used Martha Stewart "Maine Lobster" in eggshell paint finish)
scrap newspaper


The flash makes the glass look weird - sorry
This project was so much fun and really didn't take very long (and you don't have to be a furniture expert to do it)! I probably could have finished in one weekend if I had devoted most of my time to it. If any of my instructions weren't clear or if you have any questions just e-mail me - jstansbakery [at] gmail [dot] com
Tuesday, September 21, 2010
Party Food - Hummus
I have not always been a big fan of hummus. I know I've said this before, but I am picky, and hummus was one of those things I was not going to try. I repeat: NOT. GOING.TO.TRY. That all changed when Ben started making homemade hummus. It wasn't like I all of a sudden became obsessed with it, but I gradually started to warm up to it. And here I am making my own.
 Ingredients
1 can chickpeas, reserve liquid
juice from 1/2 lemon
1/3 cup olive oil
4 cloves of garlic
1 1/2 tablespoons of tahini
salt
Drain chickpeas and set aside liquid. In a food processor, add the garlic and pulse a couple of times until it is minced. Add chickpeas and most of the liquid, also add tahini, salt, lemon juice, and 1/3 cup olive oil. Process until smooth. Serve with warm pita bread.
Bruschetta is next!
And a big WOO PIG SOOIE to my Razorbacks who are ranked #10!!!

Fall 2006
Tuesday, September 14, 2010
Party Food - Taco Dip
Recently I hosted a little get-together at my house for the Kappa Delta Alum group I'm in. We had an international theme (I used a rough interpretation of international) which was more difficult to plan out than I had anticipated. Luckily, my bff and hostess extraordinaire, Elizabeth (we call her Ecampbell), had some great food ideas! I'm just going to highlight one of them tonight, but rest assured, you will get every recipe that I used, including an AMAZING dessert (not to brag or anything).
I'll start with our neighbor to the south, Mexico. Ecampbell gave me a delicious taco dip recipe. It has layers like a seven layer dip, but better, because it's served hot!

Taco Dip
1 lb ground beef
1 package taco seasoning
1 can refried beans
1 small can black olives
1 small can green chiles
1 jar taco sauce
shredded Monterey Jack cheese
Brown the meat in a skillet and add taco seasoning as if you are making tacos. Drain the excess liquid. In a dish, layer refried beans, chiles, taco meat, taco sauce, and olives (in that order). Cover with shredded cheese and bake at 350 for 20 minutes. Serve hot with tortilla chips or fritos.
The great thing about this dip is that it can be made ahead of time and just pop it in the oven before serving.
Next up, hummus!
Wednesday, September 1, 2010
Chocolate Peanut Butter Squares
Over the weekend my sister and I were trying to decide what to cook for dinner so naturally we started at the end of the meal with dessert. She whipped out her iTouch and used the Big Oven app to look up a chocolate dessert and this is what she found:

Chocolate Peanut Butter Squares
Ingredients
2 sticks butter, divided (Paula Deen would be proud)
2 cups creamy peanut butter
3 cups powdered sugar
1 1/2 cups graham cracker crumbs
2 cups semi-sweet chocolate chips (we splurged and got Ghirardelli)
In a large sauce pan, melt 1 stick of butter. Add the peanut butter, powdered sugar, and graham cracker crumbs. Stir. This will form a dough. Spoon this into a greased 9" x 13" dish and press down evenly. In a medium sauce pan, melt the remaining 1 stick of butter. Add the 2 cups of semi-sweet chocolate and stir until completely melted and smooth. Pour over the graham cracker crust and spread using a spatula. Place in the refrigerator for 30 minutes. Slice into squares before serving.
These are seriously addicting. I had to cut them into small squares so they would last longer! Enjoy!
P.S. I am so excited about the first Razorback game of the season! Woo pig sooie!

Wednesday, August 25, 2010
Egg and Cheese English Muffin
The Pioneer Woman has done it again. She always makes the most delicious food, so I was very excited when Ben wanted to try this recipe.

Ingredients
English Muffins
4-5 hard boiled eggs
shredded cheddar ("how much?" you ask. that depends on how much you love cheese, so for me it was a lot)
8 slices fried bacon
1 cup. mayonnaise
1 tablespoon Dijon mustard
2 teaspoons garlic powder
Worcestershire sauce
Chop the hard boiled eggs. Chop the fried bacon. Put the eggs and shredded cheddar in a bowl. Add the bacon and a cup of mayonnaise and stir. Add a tablespoon of Dijon mustard and 2 teaspoons of garlic powder. Add two-three dashes of Worcestershire sauce. Stir everything together slowly. Spread on the top of half of an English Muffin. Put them on a cookie sheet and broil for three-four minutes with the rack in the middle of the oven.
yum! And the best thing about these is that you can make them the night before and pop them in the oven the next morning!
Subscribe to:
Posts (Atom)