Sunday, December 27, 2009

Christmas Cookies and Treats

Even though the holidays are over (except for New Year's!) here is a recap of what I made this Christmas season!

Gingerbread men and gingerbread women cookies, chocolate chip cookies, Christmas tree sugar cookies are just the beginning!


This chex mix was part of the Christmas goodies our neighbors and co-workers received this season.
The recipe can be found on this post.


I could not pass up these Chinese take-out containers from Hobby Lobby.  They were the perfect size and too cute!


I made some more of the chocolate chip drizzle cookies.


Can't forget the Christmas tree cookies!  The recipe for the cookies and icing can be found on this post. 


Last but not least, I made red velvet cupcakes with green buttercream icing! YUM!


Monday, December 21, 2009

Homemade Chocolate Chip Cookies with some flair!


How many of you like to take something ordinary and fancy it up a bit?  You know, give it a little flair.  Well, I do!  And that's exactly what I did to these chocolate chip cookies.  Ok, get ready for this...this was my very first time to make chocolate chip cookies from scratch!  (I can't believe I said that out loud!)  Well, see, the thing is, I love tollhouse cookie dough.  It just seemed so perfect, like nothing could beat it (now I'm not saying that these cookies beat it, but they definitely would give them a run for their money).

I'll give you one guess as to where I got the recipe...yep, that's right, Southern Living.  It's called their "All-time Favorite Chocolate Chip Cookies" and I can see why.

Ok, let's get back to the fancying it up a bit.  I just couldn't resist.  Plus, who doesn't love more chocolate?  I just took the left over semi sweet morsels and melted them in a double-boiler (adding some butter to make it smoother).  Using the spoon I was stirring with, I drizzled chocolate over the cookies.  As you can see, I dipped a couple of them half way in chocolate.  Ben personally likes the ones that are covered in chocolate, so I did a couple of those for him (not pictured).  This can be done to oatmeal cookies, sugar cookies, anything really!

Merry Christmas!

Thursday, December 17, 2009

Cheesy Ranch Chex Mix


I found this recipe on the back of the Chex cereal box.  So I guess all of that reading the back of cereal boxes has paid off!

Ingredients:
9
cups Corn Chex®, Rice Chex® or Wheat Chex® cereal (or combination) I used corn and rice Chex
2
cups bite-size pretzel twists
2
cups bite-size cheese crackers
3
tablespoons butter or margarine, melted
1
package (1 oz) ranch dressing and seasoning mix
1/2
 cup grated Parmesan cheese

In large microwavable bowl, mix cereal, pretzels and crackers. In small microwavable bowl, microwave butter uncovered on High about 30 seconds or until melted. Pour over cereal mixture; stir until evenly coated. Stir in dressing mix and cheese until evenly coated.

Microwave uncovered on High 3 minutes, stirring after each minute. Spread on waxed paper or foil to cool. Store in airtight container.

The Chex website has a recipe for everyone, whether you like salty, cheesy, or sweet treats!  This weekend while I'm baking a thousand other things, I think I'll make some puppy chow, too! (p.s. how did this get named "puppy chow"? Not that my dogs wouldn't love to have a treat like this...)

*recipe found here.

Wednesday, December 16, 2009

The Last of Christmas Paintings!

Without a doubt in my mind I can say I am burned out on Christmas paintings.  This is not to say that I will never paint similar things again, because I know I will, but perhaps with some colors other than red and green (I'm thinking pink would be a good start).  To finish out the painting season, here are the last few that I did:


Yes, I know this one is not Christmas related, but I couldn't resist!


I hope everyone is enjoying this holiday season as much as I am!  This weekend I'm making tons of cookies, so be on the look out next week!

Tuesday, December 15, 2009

Monkey Bread!


I am new to monkey bread, although I don't know how I could have missed it my entire life, but I somehow did! 

Here's everything you need:
1 bag of dinner rolls (not buttermilk)
1/2 cup sugar
1/4 cup cinnamon
1/2 lb butter
2 tbsp. cinnamon
1/4 cup sugar

I let the dinner rolls thaw since I got them from the freezer section (I placed them in the oven on 100 degrees and let them rise a little, too). This made them easier to pull apart and also fluffier.

Pull the rolls in half. Combine 1/2 cup sugar and 1/4 cup cinnamon in a medium sized bowl. Roll the dough pieces in this mix. Melt butter and stir in 2 tablespoons of cinnamon (I probably used about 4 tbsp - oops!) and 1/4 cup sugar.  Grease a bundt pan. Place half of the rolls in the bottom and pour half of the butter mixture over it. Place the other half of the rolls on top and pour the rest of the mixture.  If you like your monkey bread to be extra buttery/cinnamon-y, then add a little more butter, sugar, and cinnamon than it calls for. Bake for 30 minutes on 350 degrees.

If I were making this bread for, say, Christmas morning (and we all know how hectic Christmas morning is), I would make the bread the night before and place it in the refrigerator and wait to bake it in the morning.  The bread really tastes best when it's right out of the oven.  Unfortunately, microwaving it is just not the same.

*This recipe is adapted from the one found here.

Thursday, December 10, 2009

Christmas Pretzel Treats


At this time of year, (btw, Christmas is only 15 days away!) I find myself in the mood to bake...A LOT!  And while this treat is not something I necessarily had to bake (it did not require going in the oven), it's still adorable, easy, and a great Christmas snack to give to friends and neighbors!

I bought a large container of small pretzel rods (you can use large pretzel rods, too), chocolate bark, and Christmas sprinkles.  Follow the instructions to heat the chocolate. Then it's an easy three step process: 1) dip the pretzels, 2) sprinkle a little dots, and 3)let them dry on wax paper.


Well after I finished all of the pretzel rods, I still had melted chocolate that needed to be used and I am a firm believer in not wasting chocolate.  So what did I do?  I opened a bag of mini pretzels and started dipping!  They are kind of messy looking, but still taste good!


I'm in a group called the Jingle Belles and we are having our annual holiday party to raise money for the Centers for Youth and Families in Little Rock. Check out the website and come to the party if you're in the area!

Tuesday, December 8, 2009

Catering a Party

Oh my goodness gracious, Ben has officially catered his first party and he's going to be so mad that I'm about to brag about him so much!  However, I'm going to have to start off by saying I have ZERO pictures of the food (boo, I know), but whenever you're cooking/baking it's hard to remember to stop and take pictures (I will try to get better, I promise!). The only picture I have is one of the chocolate chip cookies I made (those will come in a later post).  This post is to give some ideas about what appetizers work well together, because I know during this time of year (Christmas!) there are lots of parties!

Ben was asked to prepare food for about 50 people that were going to a fundraiser.  He did so well!  With a little over a week to get everything together, he started the planning.  Here's a list of foods he made:
In case you weren't counting, that's NINE items!  Whew!  Just listing them makes me hungry!

I was in charge of dessert so I made homemade chocolate cookies with chocolate drizzles and pecan tassies (my new favorite)!

For each item made, I have put a link to a recipe that is similar to the ones Ben used.  This was no easy task and he did a great job!!!

Saturday, December 5, 2009

Rockin' Around the Christmas Tree!

This post should have gone up last weekend whenever I finished decorating my family's Christmas tree,  so sorry for the delay!  I love it, though!  We started the silver and blue theme last year and while we're using the same ornaments this year, it still looks different!  The one thing that is different about the tree this year is the silver mesh-like ribbon that goes all the way down the tree.  I love this stuff.


Lights on!

Lights off!

We have the same thing in green on the mantle, around the banister and outside around the front door.  I'll try to remember to take pictures.  The ribbon is called mesh Sinamay and it can be found at Tipton-Hurst Florist if you're in Central Arkansas or at other online retailers.

Sunday, November 29, 2009

Pecan Tassies

These treats are so good and perfect for holiday parties!

They are called pecan tassies and I found the recipe on Southern Living's website where they are featuring 22 different pecan desserts. And believe me, this was not the only one I want to try!

The recipe is relatively easy - make the dough, make the filling, put them together, then bake. I would suggest making the holes in the dough as large as possible so it can fit the most amount of filling because that's the real treat! Also, after making the first batch I realized I needed to try to make sure that the filling does not flow over the edges too much because it will burn when baking. Next, I found that using a teaspoon to spoon the filling in is the perfect amount. Lastly, depending on your oven, I would recommend baking them for 2-3 less than what the recipe says.

Oh and I added just a touch of almond extract to the filling. I couldn't resist!


Tuesday, November 24, 2009

Cupcakes with Buttercream Frosting

When I was making the polka dot birthday cake I knew I would end up with extra icing because would rather make too much than not enough. Luckily I needed to make cupcakes for a meeting I was going to early in the week, so the icing was put to good use! Not only the icing, but I was also able to use the smaller fondant polka dots, too!

The cake was double chocolate - yummy!

I've learned you cannot go wrong with buttercream frosting! Here's recipe:

1 lbs powdered sugar (10x sifted)
1 tablespoons Wilton Meringue powder
1 dashes salt
1 cups white crisco
1 teaspoons Wilton no-color butter flavor
1 teaspoons clear vanilla extract
3-4 tablespoons water

Cream shortening, add butter flavor and vanilla and mix well. Add Meringue powder, sugar, and salt and gradually add water.

Thursday, November 19, 2009

Holiday Paintings

I promised I would put up more of the canvases I've been working on, so here they are!


The "Grinch" one is my favorite (such a great movie)! I'm thinking about hanging it in my office during the holidays!


A family friend requested the below painting. I thought the colors turned out really well!

I have an order for a canvas with a snowman and the phrase "Let it snow", so that will be my weekend project (after the Razorback game, of course) and I'll report back next week!

Hope everyone has a great weekend!

Tuesday, November 17, 2009

A Twist on an American Classic


On Sunday I was thinking "hmmm what sounds good for lunch?" (ponder ponder ponder). "I got it! A grilled cheese sandwich!" Well, if I've learned anything about Ben it's that he likes to make foods fancier, more elaborate. Therefore, the grilled cheese was not safe from his imagination. All of a sudden he's grabbing the dijon mustard, finding a green apple and throwing bacon in a skillet.

Since sliced American cheese was not good enough for this sandwich anymore, we had to use cheddar, but all I had was shredded (desperate times call for desperate measures). On top of the cheese is the dijon mustard, then apples, then bacon. I know what you're thinking...this could turn out bad. But it didn't! This sandwich was delicious! And to think, I was going to eat a boring ole grilled cheese!

Sunday, November 15, 2009

Polka Dot Birthday Cake


This past week (yes, it took an entire week) I made a birthday cake for Madison, Ben's cousin, who turned 14. She wanted a three tier cake with bright color polka dots and let me tell you, I was NERVOUS about making this cake. I mean, I've made a two tier cake before, but never three! And I had never done bright polka dots either! This was going to be a challenge, but one that I readily accepted!

I began researching and luckily I know someone who is a cake expert who was really helpful (but probably got slightly irritated that I asked her questions just about everyday!). She suggested that I make fondant for the polka dots. This way I could make them ahead of time and could just place them on the cake rather than having to use icing.

I found a marshmallow fondant recipe for the polka dots (which definitely tastes better than regular fondant...less chalky and cardboardy). This was the first thing I made for the cake (on Monday evening). It must be refrigerated for at least 24 hours before dyeing it. I used Kroger brand neon food coloring and I definitely recommend it if you want bright colors.

Before I started dyeing the fondant, I covered the fronts and backs of my hands with crisco, which kept them from being permanently dyed hot pink or lime green! Or I guess you could wear gloves, but that would be taking the easy way out! To make the polka dots, I searched my kitchen for all sorts of different sized glasses - juice glass, shot glass, the reverse side of a icing tip, etc.


Here are the three cakes before I stacked them. Once they were stacked, I stuck a 1/4" wooden dowel rod, which I sharpened with a pencil sharpener, down the middle of each cake to hold them in place. To smooth out the cakes, I used a trick that I have begun to see more often: The Viva Paper Towel. AMAZING! These paper towels are definitely worth the cost. I smoothed out the cakes as much as I could with an offset spatula, then let the icing dry about 30-45 minutes before smoothing it out with the paper towel. Here's a video that demonstrates this technique.

I used buttercream icing for the entire cake. I doubled this recipe and even had some left over!

2 lbs powdered sugar (10x sifted)
2 tablespoons Wilton Meringue powder
2 dashes salt
2 cups white crisco
2 teaspoons Wilton no-color butter flavor
2 teaspoons clear vanilla extract
6 tablespoons water

Cream shortening, add butter flavor and vanilla and mix well. Add Meringue powder, sugar, and salt and gradually add water.

Make sure you add a little more water than it calls for, because the icing has to be very soft so it's easier to spread. I even stuck the cakes in the refrigerator for a while before icing them so they would harden a little.

To fill in the areas where the cakes didn't quite come together I used white icing and made large white dots. This way it didn't take away from the bright polka dots by adding another color to the cake.

This was the most challenging cake I have ever made, but I made it! Whew! I wonder what my next cake project will be! (Ben's birthday is in three months. It's going to be hard to top the fish cake.)

Thursday, November 12, 2009

A Whimsical Christmas


I think everyone will agree when I say that the Christmas season is upon us! Stores are putting up holiday decorations, the weather is starting to get cool (finally), and radio stations are starting to play Christmas tunes. (fa-la-la-la-la)

Whenever this time of year approaches, I find myself in the mood to do more arts and crafts (as I'm sure many of you do). My first project this Christmas season is a collection of whimsical Christmas signs. "'Tis the season to be JOLLY" is the first to be completed (but there are many more to come, don't worry)! This one was painted on a 16x20 canvas with candy cane stripes and a cute polka dot ribbon. This weekend I have many (probably too many) projects to complete, one of which consists of finishing a Grinch-themed sign, as well as some other fun Christmas ones. (Oh and I have a birthday cake to deliver Saturday! Pictures to come!)

Please contact me by e-mail or leave a comment if you would like to purchase a Christmas-themed sign of your very own! They can be made to say anything you want and in any size and color.

P.S. Christmas music starts on Sirius radio on Monday, November 16! Channels 3, 4, 7, 9, and 62!

Thursday, November 5, 2009

Halloween Costume - Betty Draper

For Halloween this year Ben and I went as Don and Betty Draper from AMC's Mad Men. We've become slightly obsessed with the show and who wouldn't love an excuse to dress like they're from the 1960s? So with Halloween as our excuse, we began working on our costumes. Ben's was easy because he already had a gray suit. After that all he needed was a skinny tie, pocket square, and slicked-back hair. Well luckily his great-aunt left him a bunch of ties that one of her husbands used to wear and even more lucky was that Ben decided to actually keep a couple of them. Next came the pocket square. Well he just dropped by Jos. A. Bank and grabbed one (I actually quite like them). Oh and he borrowed a brief case that my dad used to use, but that was just a bonus. Poof! Ben's costume is complete.

My costume was considerably more difficult to find, and I actually never found a dress I wanted (that was a somewhat reasonable price). While shopping in a vintage store, becoming frustrated that I could not find something that looked like "Betty", it dawned on me. Why don't I just make my halloween costume. Sewing a dress couldn't be that hard, right? You just follow the pattern, simple as that. Oh how wrong I was. Haha. I laugh just thinking about the silly ideas that were going through my head as I was coming up with this brilliant idea.

Next thing I know I'm dragging Ben to Hancocks Fabric store looking for a floral print (those were popular back then, right?) I found one with purple, blue, and teal in it (I could see the dress in my head, I had the perfect belt to match). Here I am, fabric in one hand, pattern in the other, determined that I was going to sew the perfect Betty Draper dress - zipper and all. Well let me tell you, I did not end up sewing a dress. Don't worry, I did have something to wear for halloween. What I ended up doing was sewing a skirt. See, the thing is, there is no way I could have sewn a whole dress in the amount of time I had (that's my story I'm sticking to it).


Even though I didn't complete what I had set out to, I am quite proud of the skirt I ended up with - zipper and all. Just throw on a blouse, pearls, belt, petticoat, and matching heels and I was a regular ol' Betty.

Wednesday, November 4, 2009

Baby Shower Cookies

I made some sugar cookies for a baby shower last Sunday. Well, as it turned out, the mom-t0-be ended up having her baby on the day of the shower! Madelyn Grace was born Sunday afternoon. 4 lbs. 6 oz. - simply adorable! No, the cookies did not go to waste! (are you kidding?) They were taken to the hospital to be enjoyed by visitors!

I used my favorite sugar cookie recipe.
Sugar Cookie Ingredients
  • 1/2 cup shortening
  • 1/2 cup butter, softened
  • 1 1/3 cups sugar
  • 3 teaspoons vanilla
  • 3 teaspoons almond
  • 2 eggs
  • 3 cups sifted flour
  • 1 teaspoon salt
  • 3/4 teaspoon baking powder
  • 2 tablespoons milk
Directions
1. cream shortening, butter, sugar, almond, and vanilla.
2. add eggs, beat well.
3. Sift flour, salt, and baking powder. Stir into creamed mixture along with milk.
4. chill overnight
5. roll onto floured board into 1/4" thickness and cut into desired shapes.
6. Place on greased cookie sheet and bake at 375 degrees for 4-6 minutes.

For the background of the cookies, I used this icing because it hardens and is easier to write on:
  • 2 cup confectioner's sugar
  • 4 teaspoons milk
  • 4 teaspoons corn syrup
  • 3 teaspoon clear vanilla flavoring
  • 3 teaspoon clear almond flavoring
Stir sugar and milk together in a bowl until icing mixture is smooth; beat in corn syrup and vanilla and almond until icing mixture is smooth and glossy in appearance. Add food coloring to desired shade. Ice cookie and set aside for the icing to harden.

I did not add any color to the icing because I wanted a white background. I'm going to have to do a little research on this and if you have any suggestions let me know, because as the white icing dried it turned clear (even though I put up to 3 coats on each cookie!), so some of cookies ended up looking like it was just a pink "M" on a cookie.

For the "M" I used royal icing, because the other icing is not firm enough to write letters. Here's that recipe:
  • 3 tablespoons meringue powder
  • 4 cups (1 lb.) powdered sugar
  • 6 tablespoons water
  • 1 1/2 teaspoons vanilla extract (use clear if you want pure white icing)
  • 1/2 teaspoon almond extract
Directions
Beat all ingredients together until stiff peaks form (8-10 minutes). To vary the consistency, add water to thin and add powdered sugar to thicken. Will ice 2 1/2 - 3 dozen cookies.

Sunday, November 1, 2009

Halloween Cupcakes

Ben and I went to see some friends in Memphis for Halloween and the hostess, Katie (yes, the same Katie that made my amazing birthday cake), made the cutest, most delicious Halloween cupcakes. I know this is a little too late for this year's Halloween, but good to have for future ones! Katie got the cupcake design ideas from Martha Stewart (of course) and they turned out great! She made brain, bat, and mummy cupcakes.

We cut the bat wings out of black construction paper and used red hots for the bats' and mummies' eyes.
Katie was such a great hostess! Everything was homemade and looked and tasted great.

Ben and I went as Don and Betty Draper from AMC's Mad Men, Katie was a flapper and her boyfriend, Rob, was Edward Scissorhands (great costumes!)


Now that Halloween is over, it's time to move on to Christmas!!! (oh and Thanksgiving, too.)

Friday, October 30, 2009

Pork Tenderloin with Mustard BBQ Sauce

Ben has yet again amazed us with his culinary skills, particularly in the pork tenderloin category. Like I said in my pumpkin carving post, October is a busy month for my family. Not only are there tons of birthdays in October, but some of them even fall on the same day! For example, my uncle and I share a birthday, as well as my mom and my sister (it's just crazy!). Ok, on to the real reason I am typing this post: THE FOOD. This meal was prepared for my mom's and sister's birthdays. We had Brussels sprouts (I literally would not try Brussels sprouts until I was 23...sad I know, but I love them!), rosemary potatoes, and pork tenderloin. yummy!

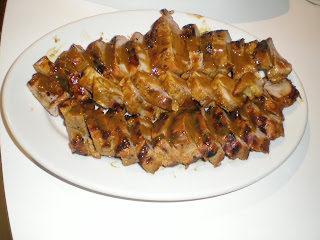
As always with the glazes and sauces Ben makes, the mustard BBQ sauce was a mixture of various things - honey, mustard, brown sugar, vinegar, Worcestershire sauce (he never really knows how much of each he uses, but it always works out). To make the sauce, put 1/3 cup of brown sugar in a sauce pan on medium heat with a couple of tablespoons of vinegar, little bit of honey, and a few dashes of Worcestershire cause, stir until dissolved (if you need to add more wet ingredients, that's fine). Add a cup of mustard to the mixture and stir. If you're not a big mustard person, I would say it's safe not to use tons of it and it would still taste good.

Ben marinaded the tenderloins in mustard for a couple of hours, but you can marinade it over night if you wish. He grilled the pork for 30 minutes total. After initially cooking the tenderloin all the way around, he started applying the BBQ sauce with a brush at 2-3 minute increments.

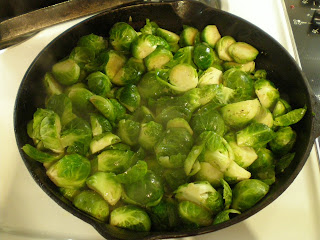
I chopped 3/4 a package of bacon, put it in a skillet, and cooked it for a few minutes, then removed the bacon and added the Brussels sprouts to the grease. Add a couple of tablespoons of butter and salt and pepper to taste, then slightly steam the sprouts at the end by placing a lid on the skillet for several minutes (remember to stir occasionally). About half way through cooking the Brussels sprouts, I added the bacon and let it finish cooking.

If you have any questions about this meal or anything else on the blog, e-mail me at jstansbakery@gmail.com.